Admin Getting Started
Who this is for: ADMIN — AI keys, game settings, and expansion management are all admin-gated.
A step-by-step setup guide for admins: enable AI narration with an API key, and choose which content sets (expansions) your promotion uses. Ten minutes from first login to a working promotion.
You need: the ADMIN role (the initial install ships an admin account — change its password first under your user menu) and a web browser.
Step 1 — Open the Admin area
Log in and click Admin in the navigation. Everything in this tutorial lives under the admin tabs: AI Settings and Expansion Management.
Step 2 — Get an API key (Google Gemini free tier)
The game's show narration, commentary, and news generation are powered by an AI provider. Without one configured, the game works but narrates nothing. Google Gemini's free tier is enough to start — no credit card required:
- Go to Google AI Studio and sign in with a Google account.
- Click Get API key → Create API key (a new Google Cloud project is created for you automatically).
- Copy the key (starts with
AIza…). Treat it like a password — anyone who has it can spend your quota.
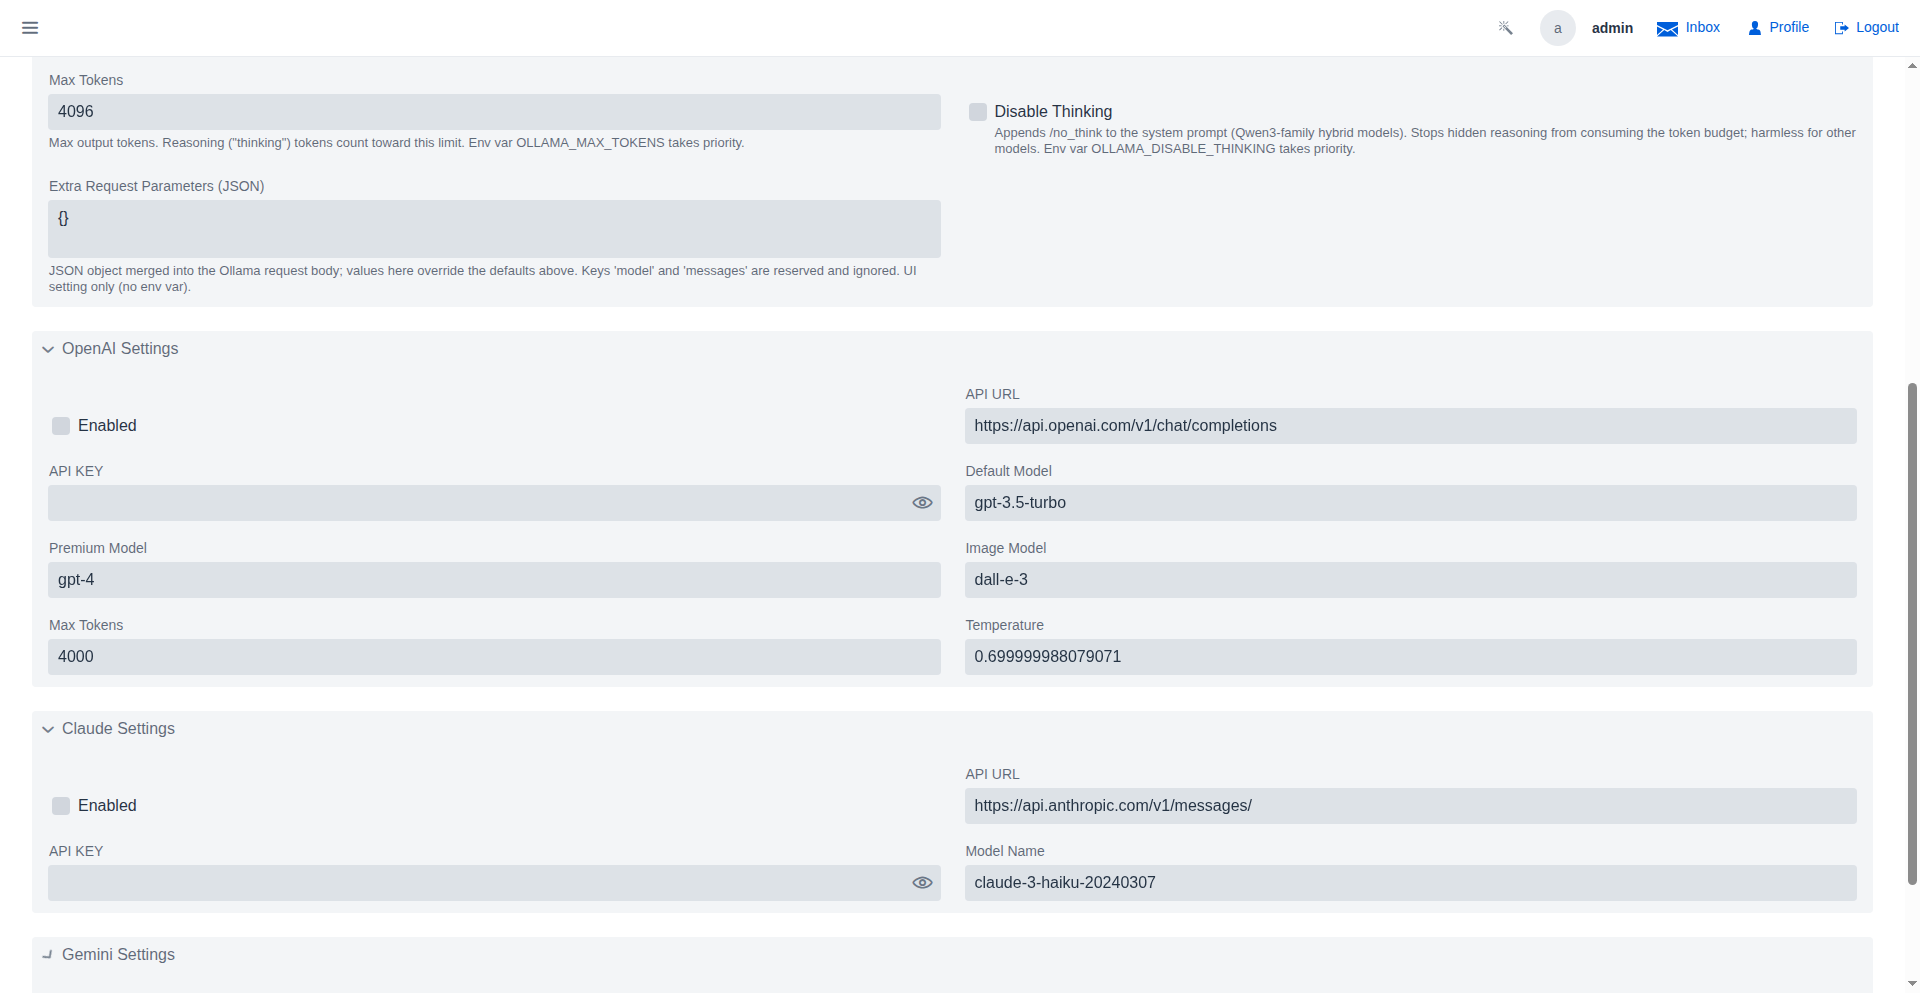
Other providers work exactly the same way — the game supports OpenAI, Claude (Anthropic), and Gemini out of the box (plus offline Ollama/Mock providers for testing). Each provider section below shows its own key field; you only need ONE provider enabled.
💡 Costs: Gemini's free tier has daily request limits that are plenty for a single promotion. OpenAI and Claude are paid per request. If you're evaluating, start with Gemini.
Step 3 — Configure the provider in AI Settings
In Admin → AI Settings:
- Find the provider section you have a key for (e.g. Gemini).
- Tick Enabled.
- Paste the key into API Key. Fields save as you edit — a notification confirms each change.
- Leave API URL and Model Name at their defaults unless your provider documents otherwise.
- If you enable more than one provider, leave Auto Select Provider ticked and the game picks the first available one.
Keys are stored in the database and survive restarts. If you run the app in Docker, you can also bootstrap keys with environment variables (AI_GEMINI_API_KEY, AI_OPENAI_API_KEY, AI_CLAUDE_API_KEY) — a value set in the UI always wins over the environment afterward.
Step 4 — Verify narration works
The easiest proof is booking any segment and running it: open a show with at least one match (see Book Your First Show) and execute a segment — AI-generated narration appears on the segment when a provider is configured. If narration fails or stays empty, re-check the Enabled box and key first; the application log carries the provider error if it's deeper.
Step 5 — Enable your content sets (Expansion Management)
Expansions are the game's content packs: each one bundles wrestler tiers, match types, segment rules, and title lineages. Admin → Expansion Management lists them with an enable toggle per set.
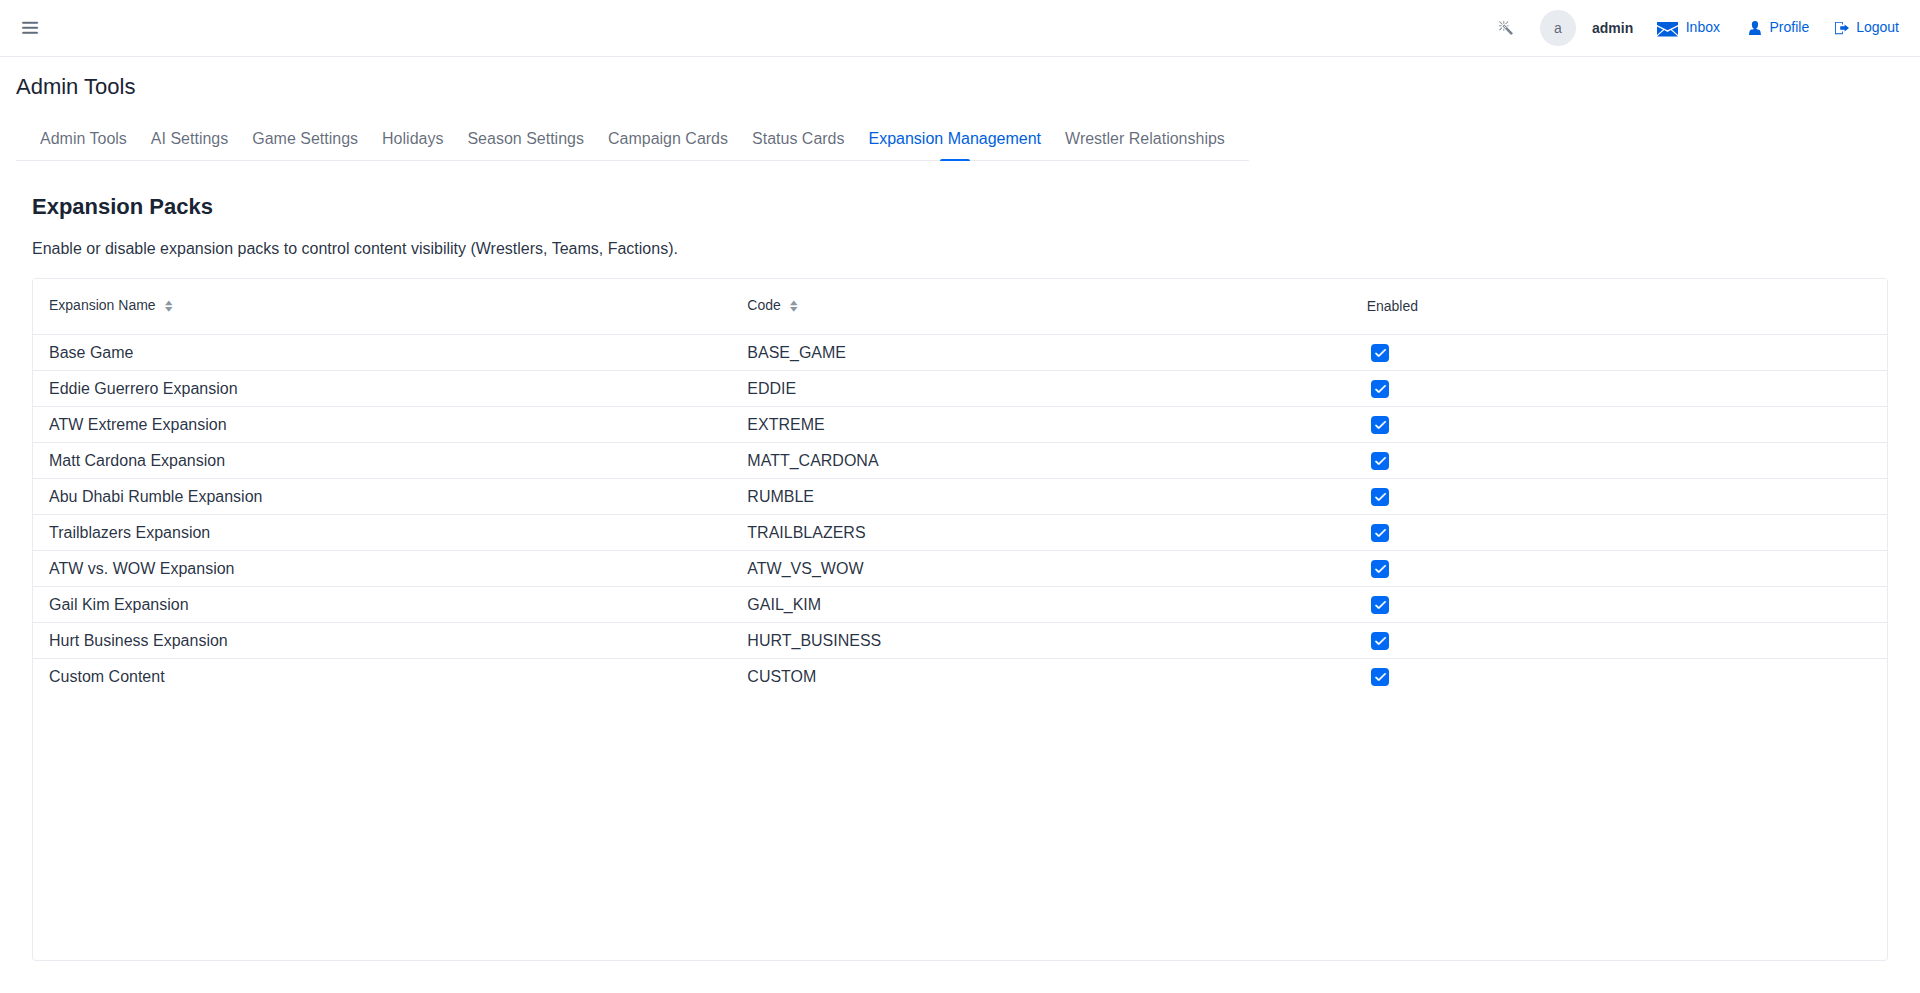
- Start small: enable the base set plus one or two that fit the era you want to book. Every enabled set widens the match types, rules, and titles bookers see when planning shows.
- Disabling a set does not delete data — it hides that content from planning. Re-enabling brings it back.
- Two expansions defining the same match type or rule resolve by priority (higher wins), so overlaps are safe to enable together.
What's next
- Hand the booker role to your first booker and walk them through Book Your First Show.
- Configure AI Providers — a deeper dive on provider setup.
- Manage Universes — splitting your world into multiple continuities.
- The auto-generated Admin Overview documents every admin screen in depth.